OTA Web Update
OTAWebUpdate is done with a web browser that can be useful in the following typical scenarios:
Once the application developed and loading directly from Arduino IDE is inconvenient or not possible
after deployment if user is unable to expose Firmware for OTA from external update server
provide updates after deployment to small quantity of modules when setting an update server is not practicable
For more information about the update process, please refer to the OTA API reference section of the ESP-IDF documentation.
Requirements
The ESP and the computer must be connected to the same network
Implementation
The sample implementation has been done using:
Example sketch
`OTAWebUpdater.ino`.ESP32 Board.
You can also use another module if it meets Flash chip size of the sketch
Before you begin, please make sure that you have the following software installed:
Arduino IDE
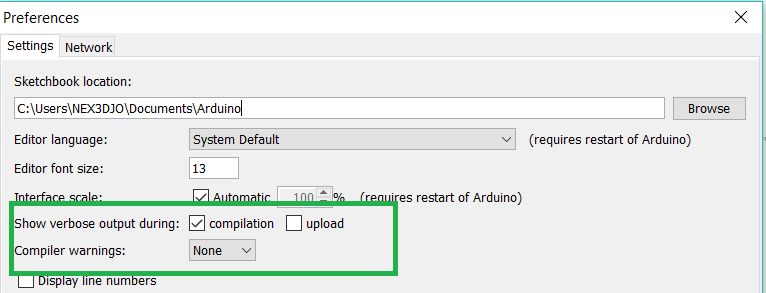
Prepare the sketch and configuration for initial upload with a serial port - Start Arduino IDE and load sketch OTAWebUpdater.ino available under File > Examples > OTAWebUpdater.ino - Update ssid and pass in the sketch so the module can join your Wi-Fi network - Open File > Preferences, look for “Show verbose output during:” and check out “compilation” option
Upload sketch (Ctrl+U)
Now open web browser and enter the url, i.e. http://esp32.local. Once entered, browser should display a form
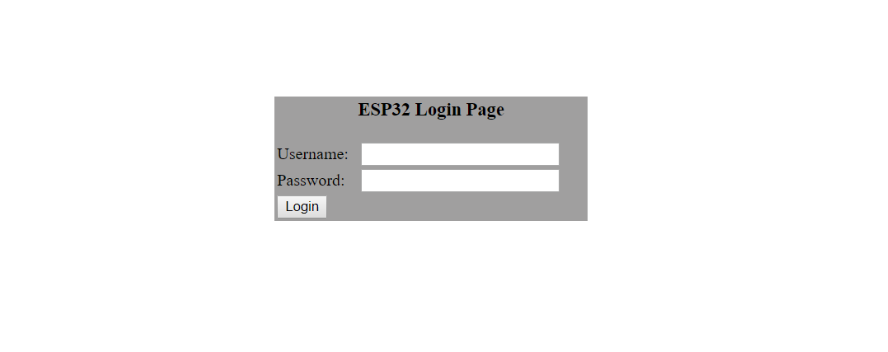
username = admin
password = admin
Note
If entering “http://ESP32.local” does not work, try replacing “ESP32” with module’s IP address. This workaround is useful in case the host software installed does not work.
Now click on the Login button and browser will display an upload form
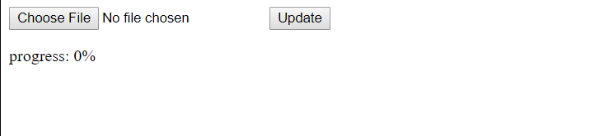
For Uploading the New Firmware, you need to provide the Binary File of your Code.
Exporting Binary file of the Firmware (Code) - Open up the Arduino IDE - Open up the Code, for Exporting up Binary file - Now go to Sketch > export compiled Binary
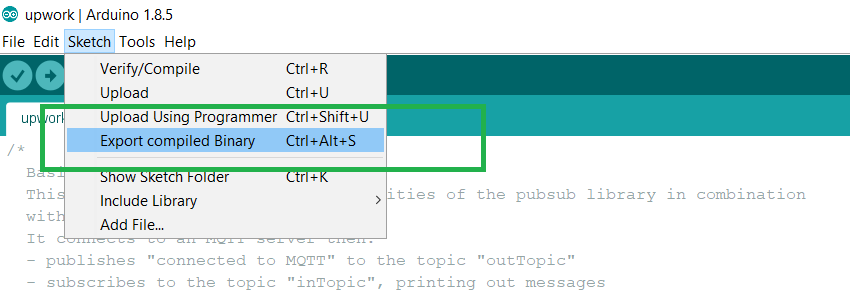
Binary file is exported to the same Directory where your code is present
Once you are comfortable with this procedure, go ahead and modify OTAWebUpdater.ino sketch to print some additional messages and compile it. Then, export the new binary file and upload it using web browser to see entered changes on a Serial Monitor.